Custom Rules
1. What is a custom rule?
Custom rules allow you to override the AI Threats Detection policies, by defining allow-lists or block-lists, ensuring that your response policy fulfills both security and business needs.
Custom rules can also be used to force a CAPTCHA or Device Check challenge on top of DataDome Threat Detection policy. In this case, DataDome blocks the incoming threats and forces the challenge on the undetected traffic.
You can add up to 1000 custom rules to your dashboard, creating each rule based on a query up to 1000 characters long.
2. Access your custom rules
To access your custom rules list, go to: Access Control > Custom Rules
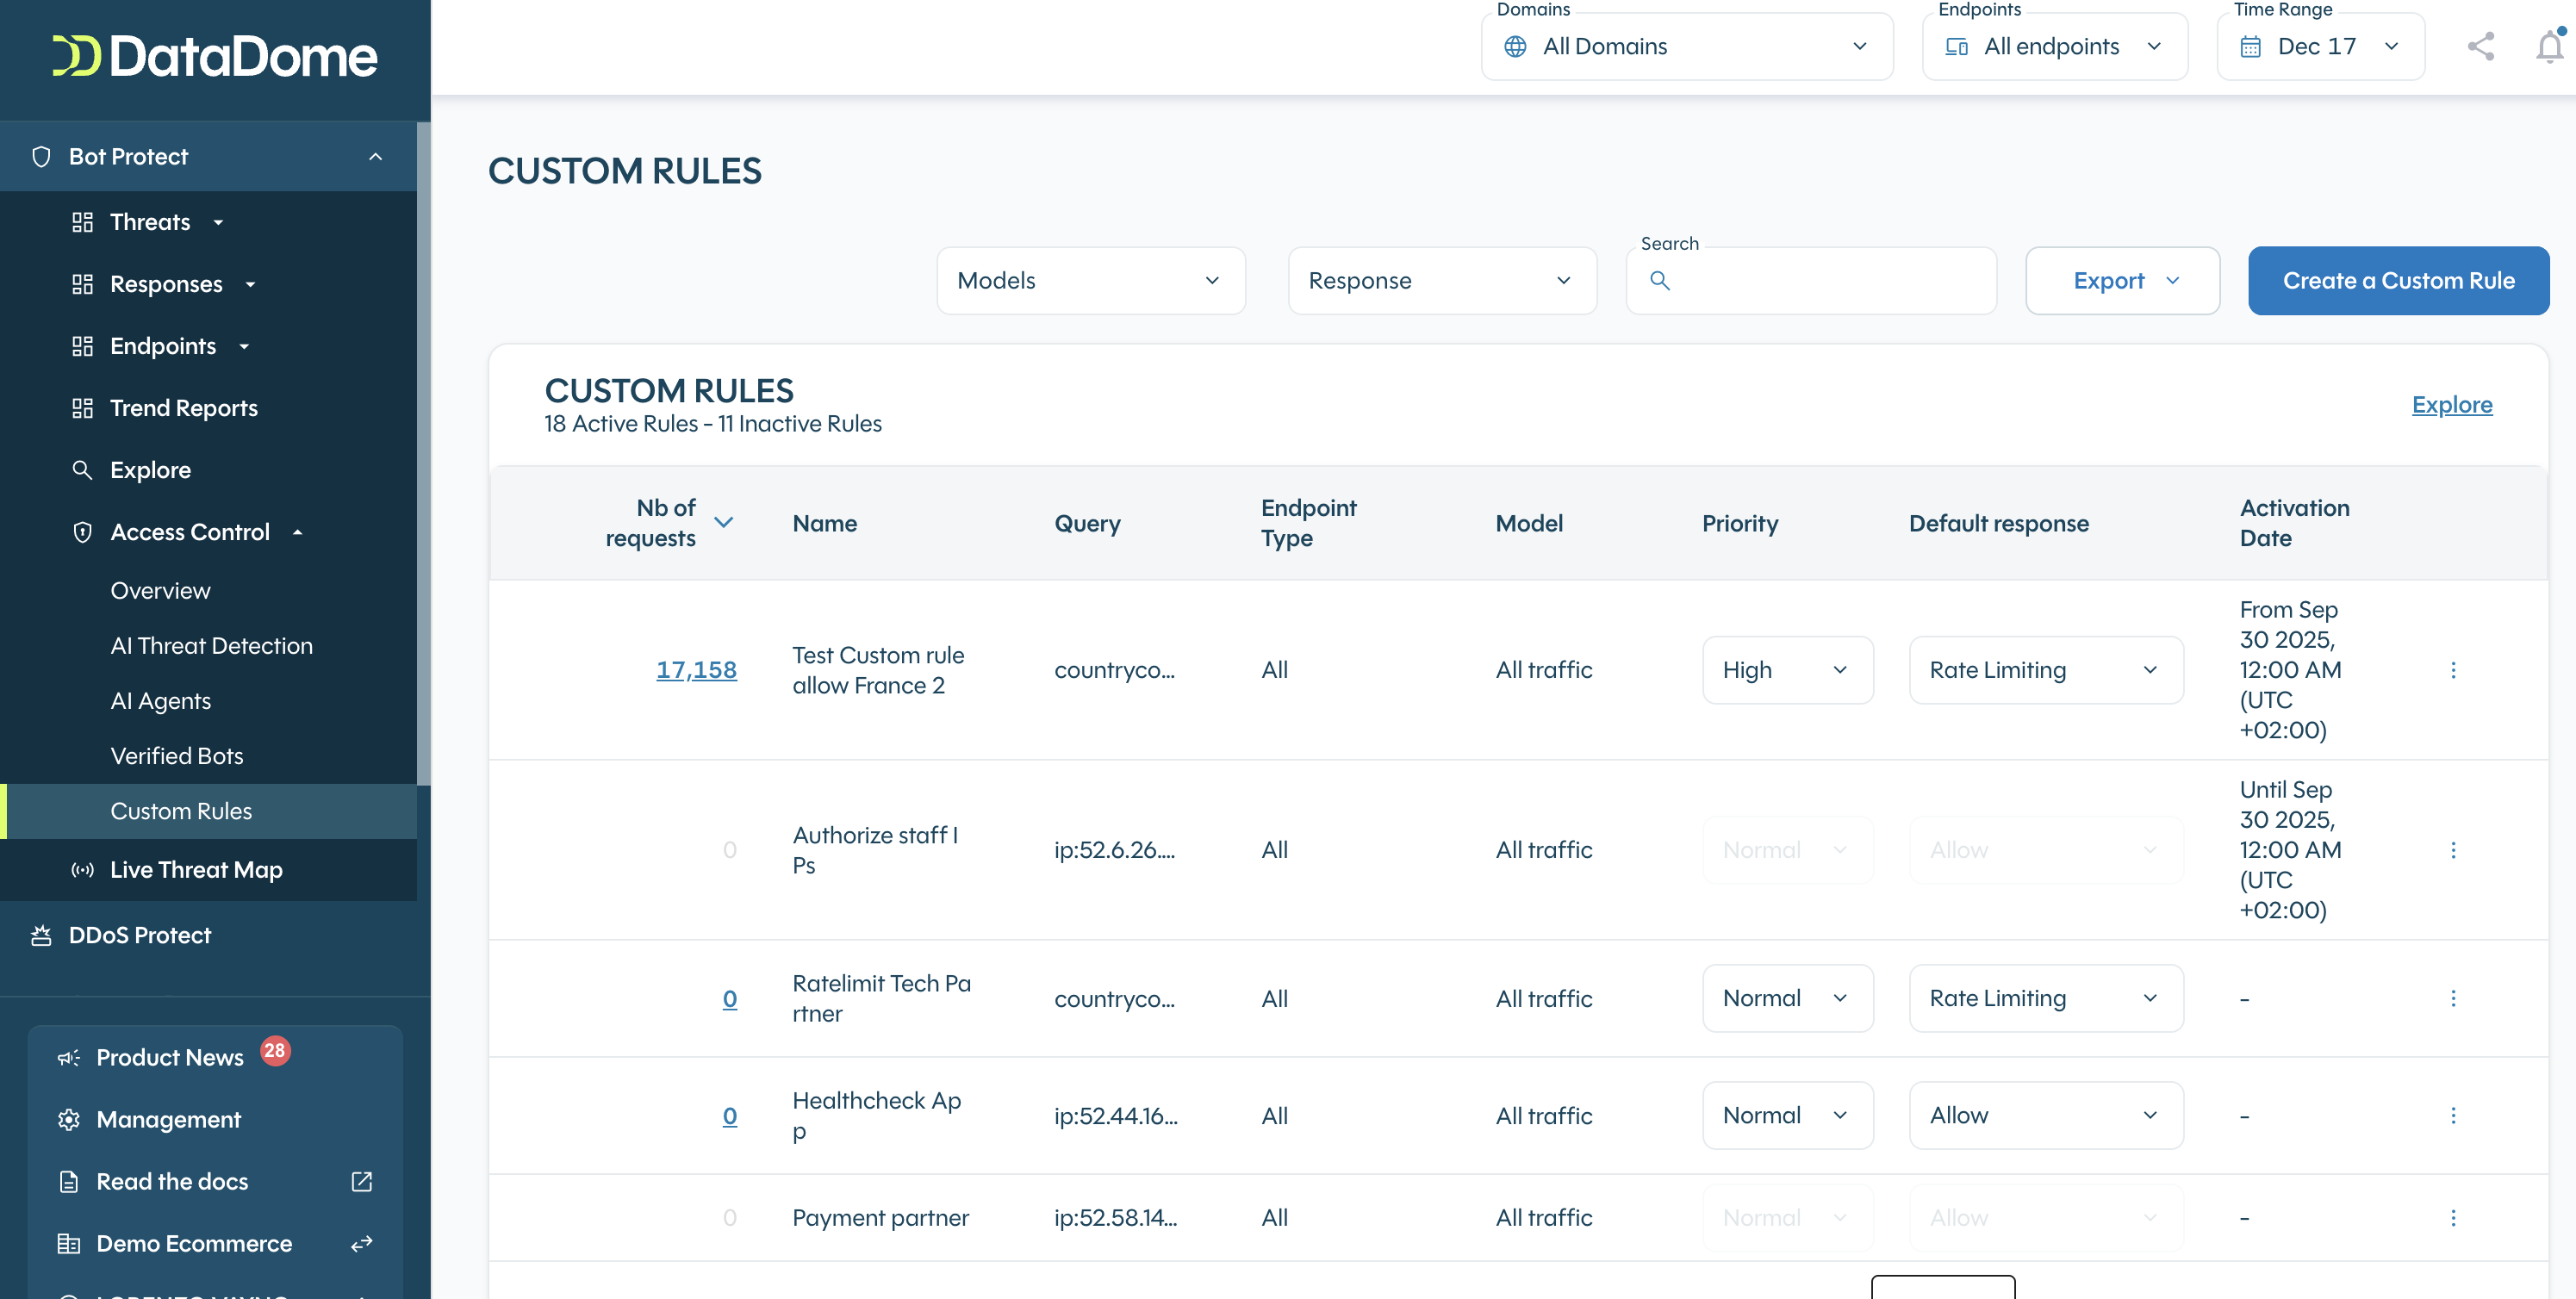
3. Add a new custom rule
Custom Rules limitIf you have reached the authorized custom rules limit, please contact support: [email protected]
Custom Rules guidelinesCreate custom rules with some granularity (group of partners for instance) to be able to track those groups and possibly implement some timebox/ratelimit if needed in the future.
To add a custom rule, just hit the button "Create a Custom Rule", you will be redirected to Explore > Custom Rules

To add a new custom rule:
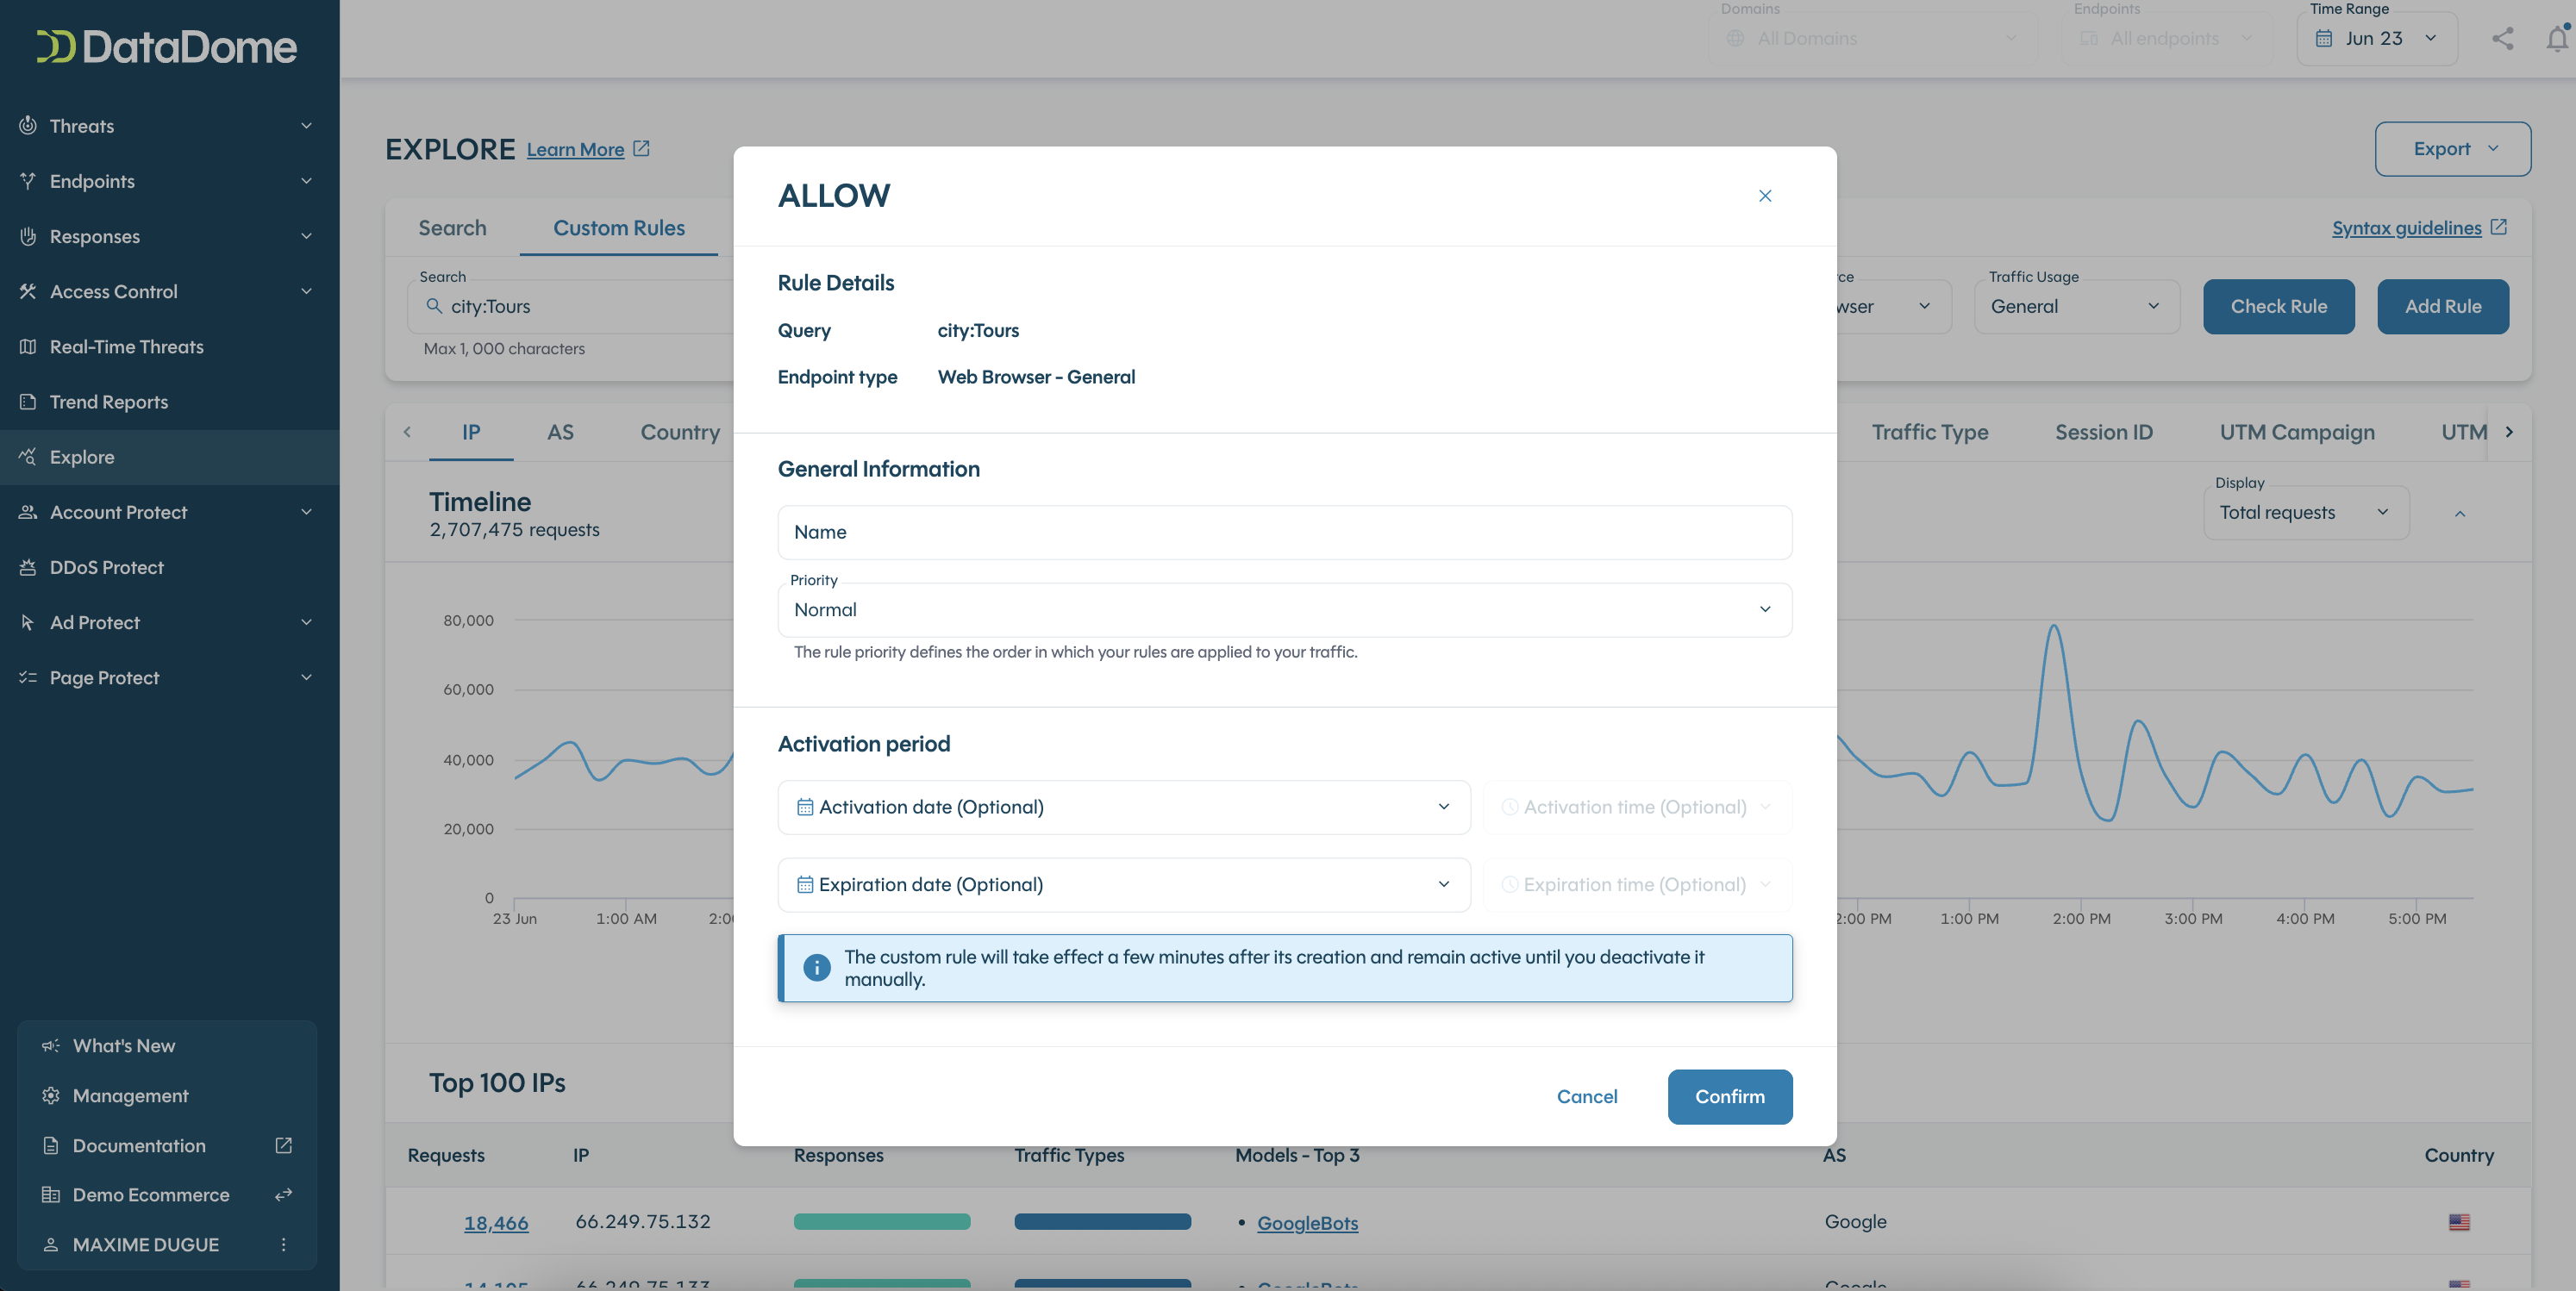
- Enter the query (Refer to "Syntax guidelines")
- Select the endpoint source and endpoint type the rule has to be applied to (Refer to "what is an endpoint?")
- If you want the rule to apply specifically on a verified bot or AI agent, select it from the dropdown menu "Model"
- Click on "Check Rule"
- Check the result
- Click on "Add Rule"
- Select the configuration you want to apply to every request that matches the rule:
- Allow: every request that matches the rule will be allowed
- Timeboxing: based on a specified time period, part of the traffic will be allowed and the remaining part can be set to Captcha, Block or Device Check
- Rate Limiting: based on a specified number of requests, part of the traffic will be allowed and the remaining part can be set to Captcha, Block or Device Check
- Captcha: a Captcha will be displayed for every request that matches the rule
- Block: every request that matches the rule will be blocked
- Device Check: every request that matches the rule will be challenged with Device Check
- A pop-up is displayed with the query and the selected endpoint type.
Depending on the configuration you choose, additional settings will be displayed to setup the custom rule. -
- Add a meaningful rule name
- Select a priority: if a request matches two custom rules, the rule with the higher priority will be applied first
- (Optional) Add an activation date and an expiration date
- Depending on the response you selected above, fill in the additional settings:

Time Boxing additional settings: you can select the response to apply for traffic incoming outside of the allowed period you set up
Rate Limit Response Counters
The rate limit response lets customers define which counter is used to trigger the rule. Options include:
- All traffic: Counts all matching requests with a single shared counter.
- Per IP: Counts matching requests separately for each IP address.
- Per session: Counts matching requests separately for each session.
Availability of IP and session rate limiting options depends on the pricing plan.

4. Test a rule
When you add a custom rule, first you have to test the result. You can save the rule after it has been tested.
If the result returned is null, you can:
1 - Expand your time range
2 - Refine your query
Rules can be saved even if the result is empty.
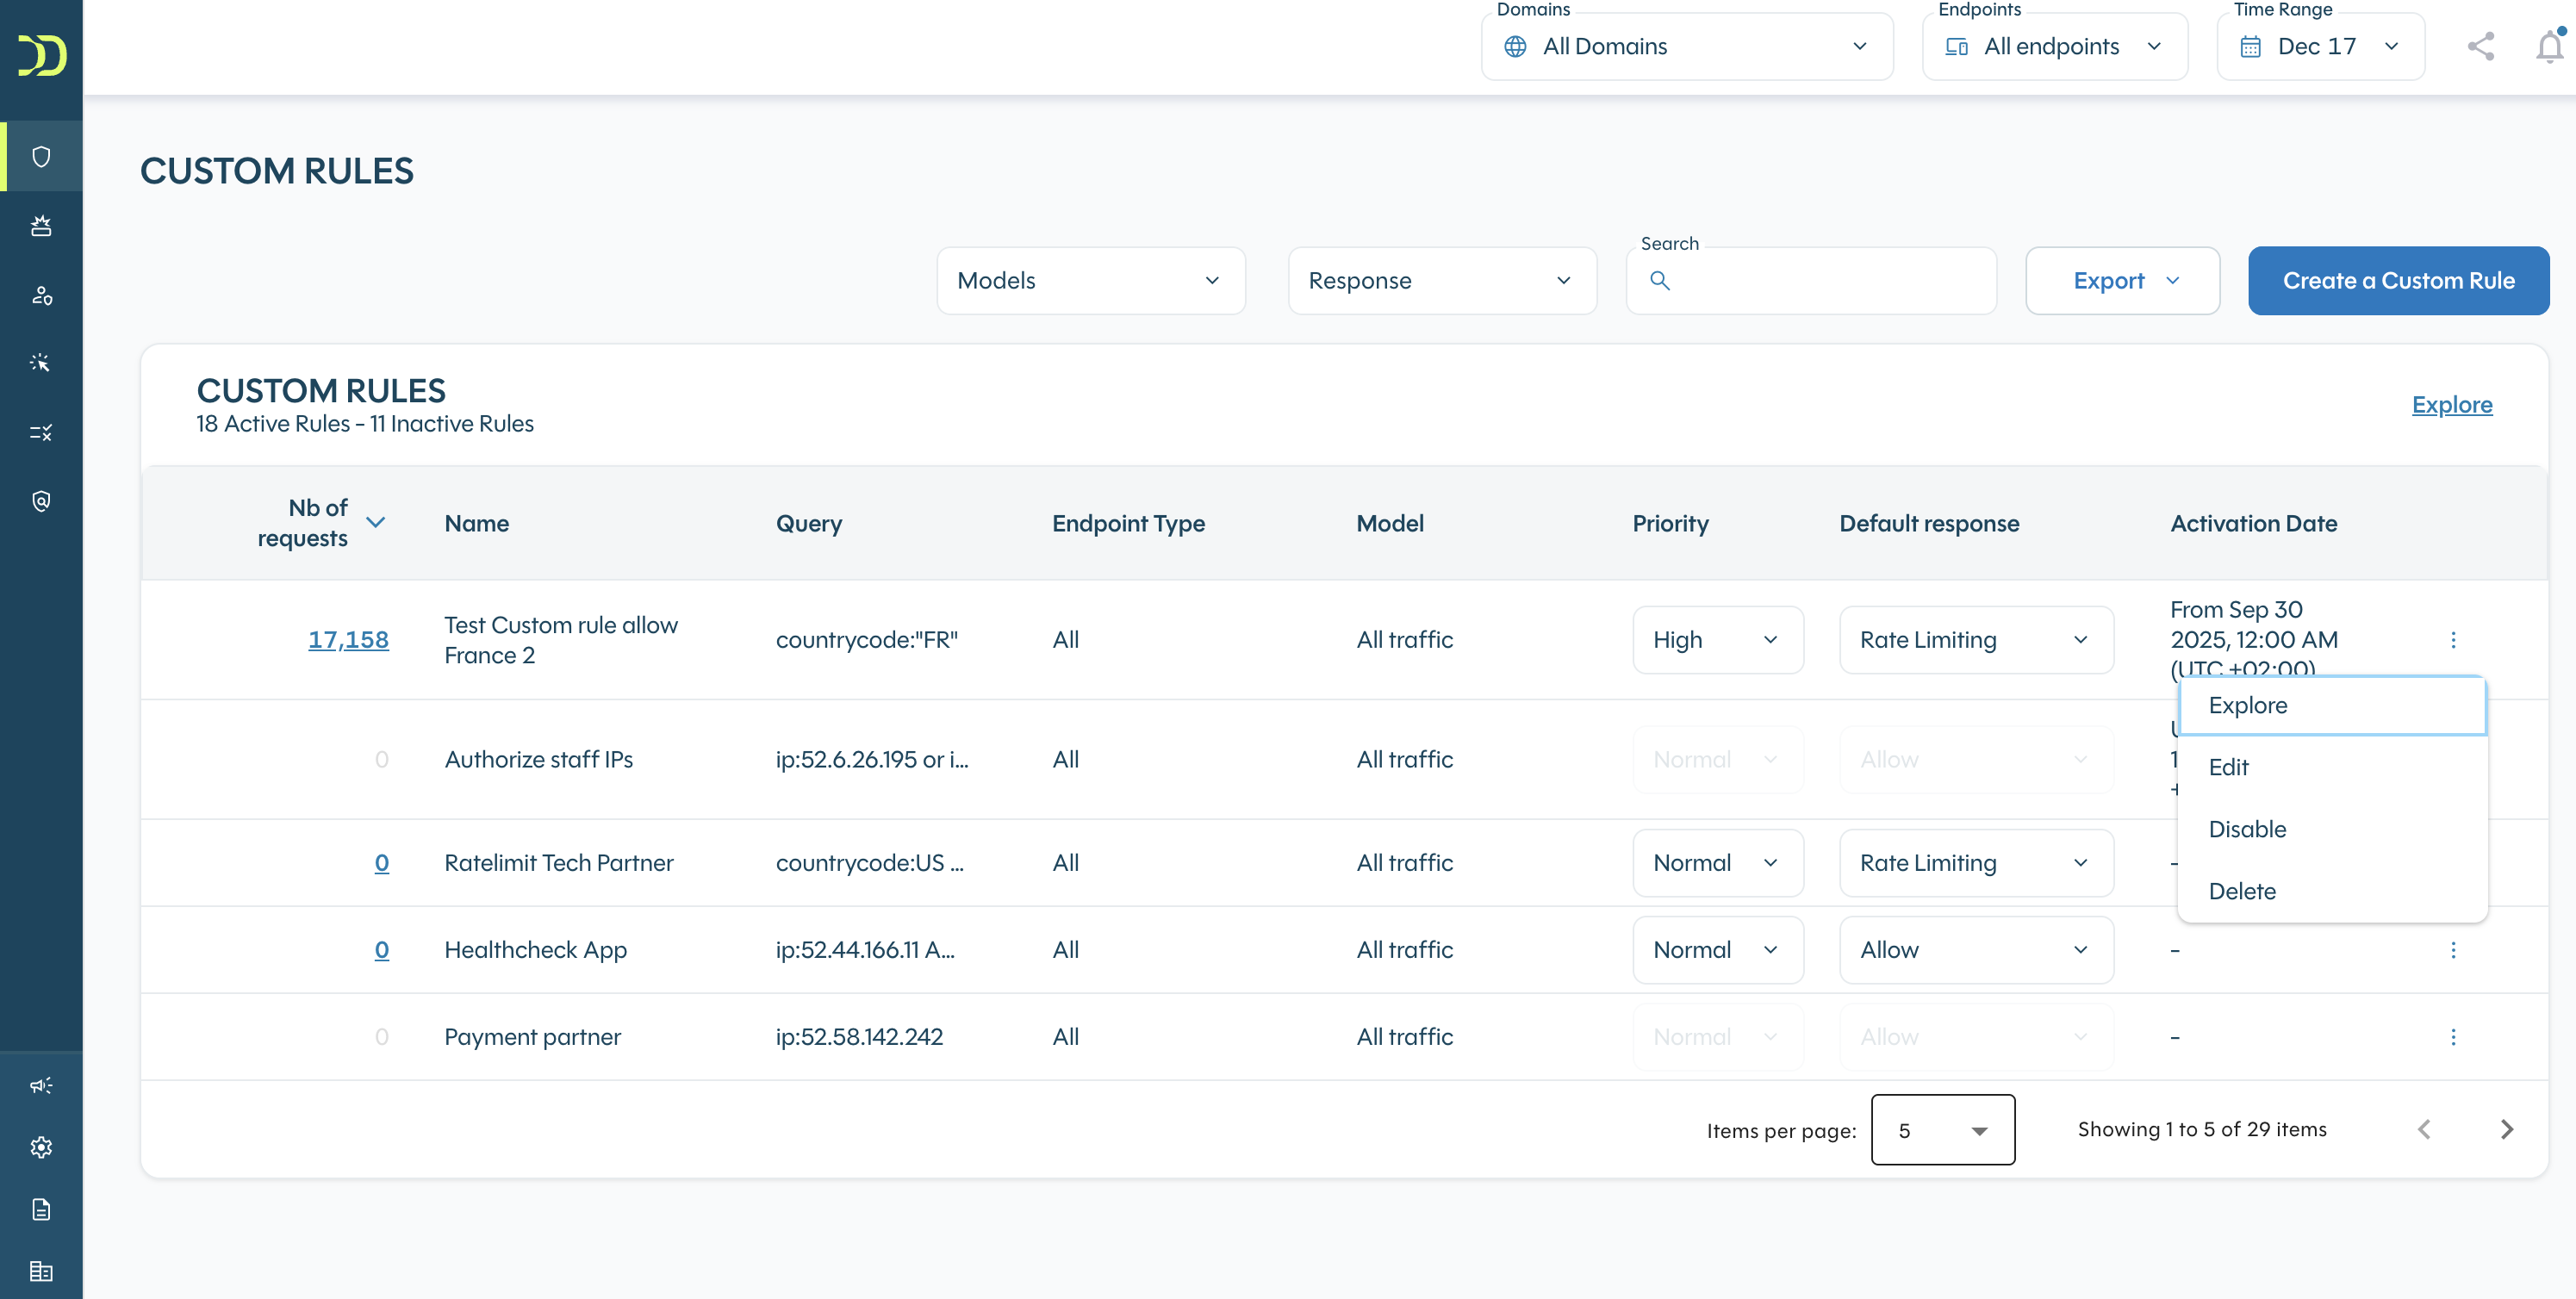
5. Edit / Delete a rule
Role restrictionsOnly "Admin" and "Editor" users have the right to add rules. See Manage User page
To edit or delete a custom rule, just hit the Action menu next to a selected rule and choose "Edit" if you want to edit the rule:
You will then be redirected to the “Explore” section enabling you to edit the query, check the matching traffic and update the rule. It is also possible to change the response and/or the name of the rule:

6. View rule requests
Once you have added the rule, you can view the requests by going to Access Control > Custom Rules, you can click on "Explore" button of the action menu in order to view more info about the requests in the "Explore" section (Refer to "How to explore your data?")
Updated 5 months ago