Google Ads integration
Tracking
Click ID
- In your Google Ads account administration interface, click on the Admin icon
- Click on Account Settings
- Scroll down to "Auto-tagging" and tick the checkbox
Parameters
- In your Google Ads account administration interface, click on the Admin icon
- Click on Account Settings.
- Scroll down to Tracking Template.
- In the "Final URL suffix field", add the following parameters:
dd=1&ddsrc=google&ddcmp={campaignname}&ddcmpid={campaignid}&ddkw={keyword}&ddpl={placement}&dddv={device}&ddnw={network}&ddag={adgroupid}&ddmt={matchtype} - Click "Save".
Active Protection
For the protection to work, DataDome must get the necessary authorizations on Google Ads.
This can be done from the DataDome dashboard by a user that has both DataDome and Google Ads administrative rights.
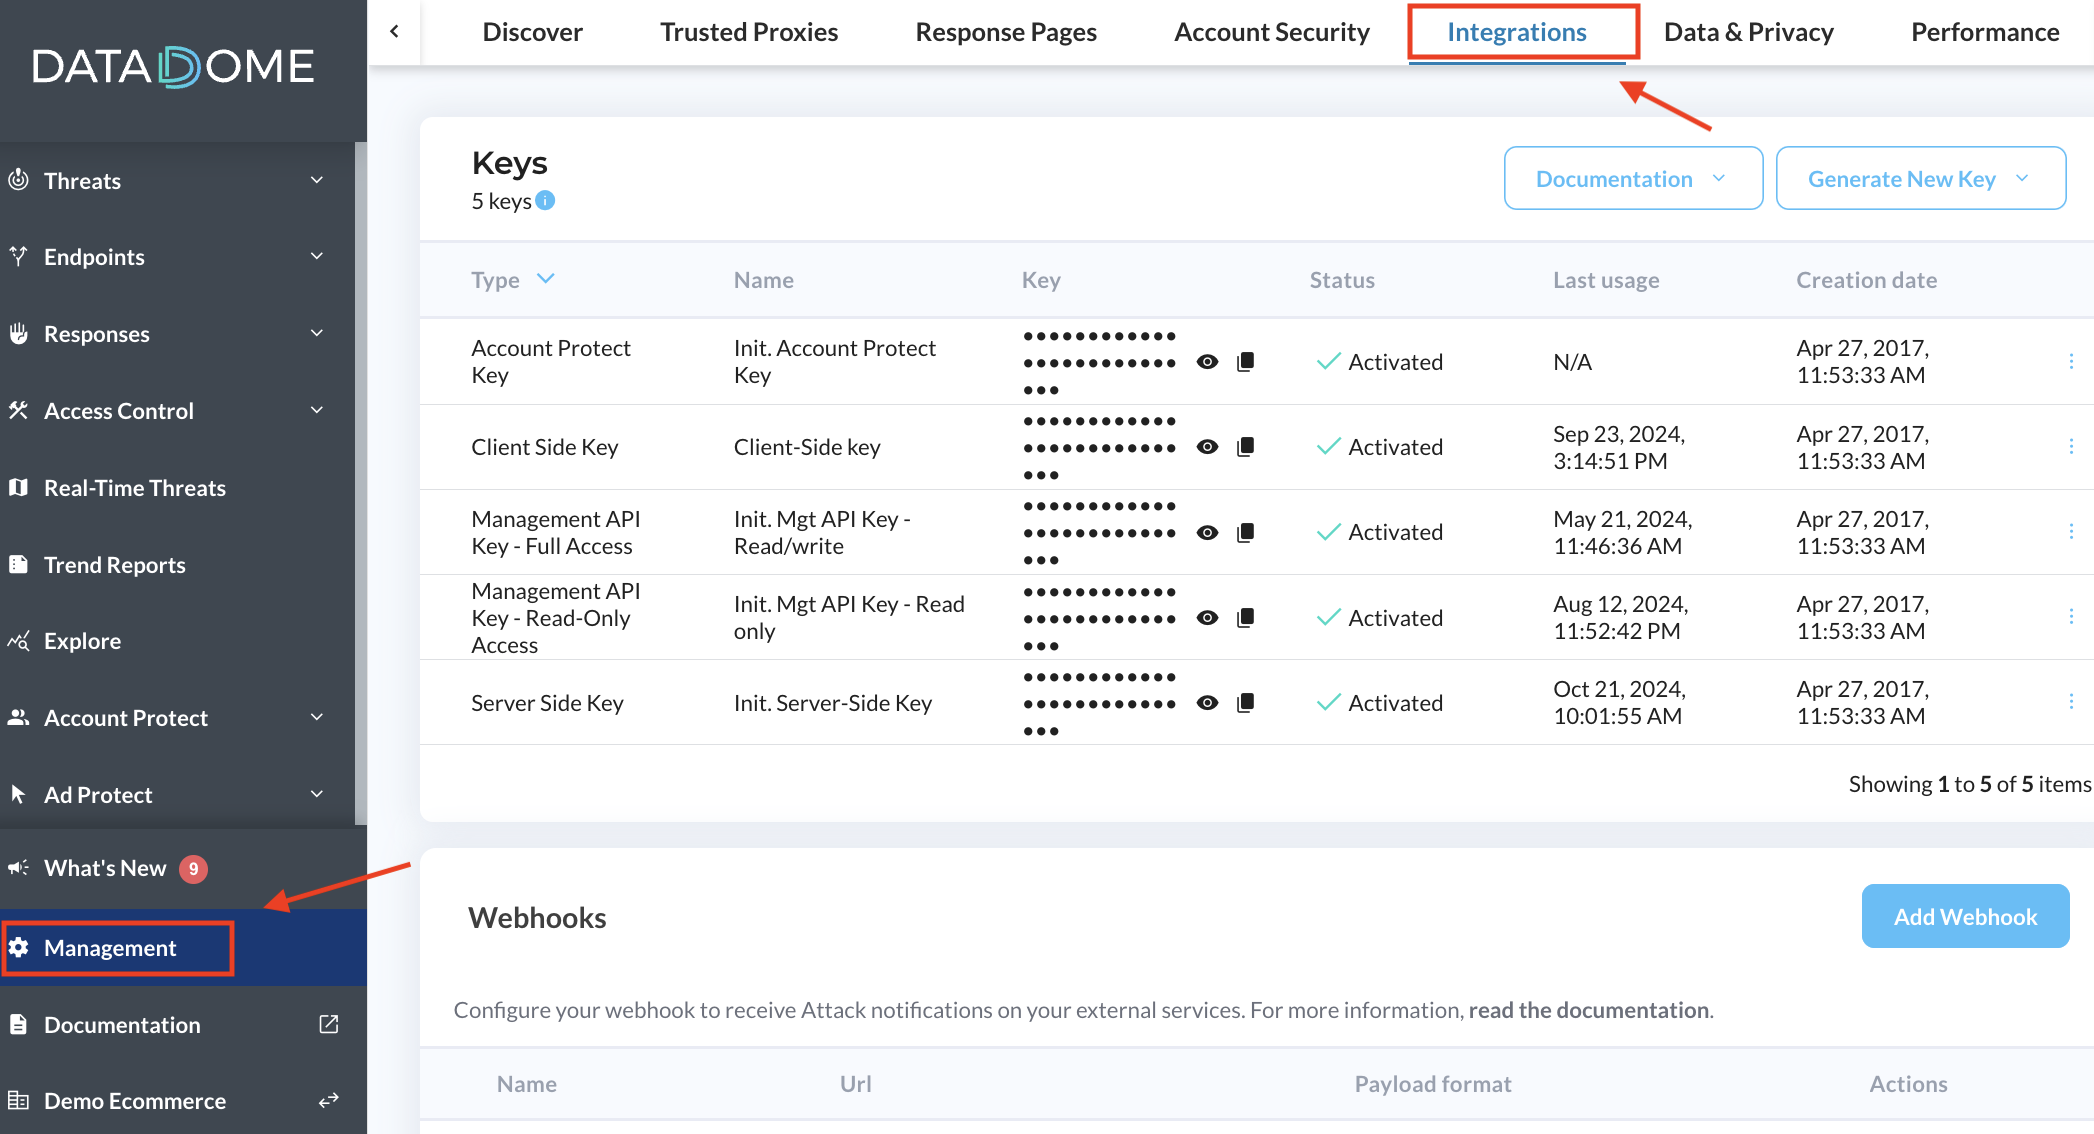
- Once logged in DataDome, select the Management > Integrations section.
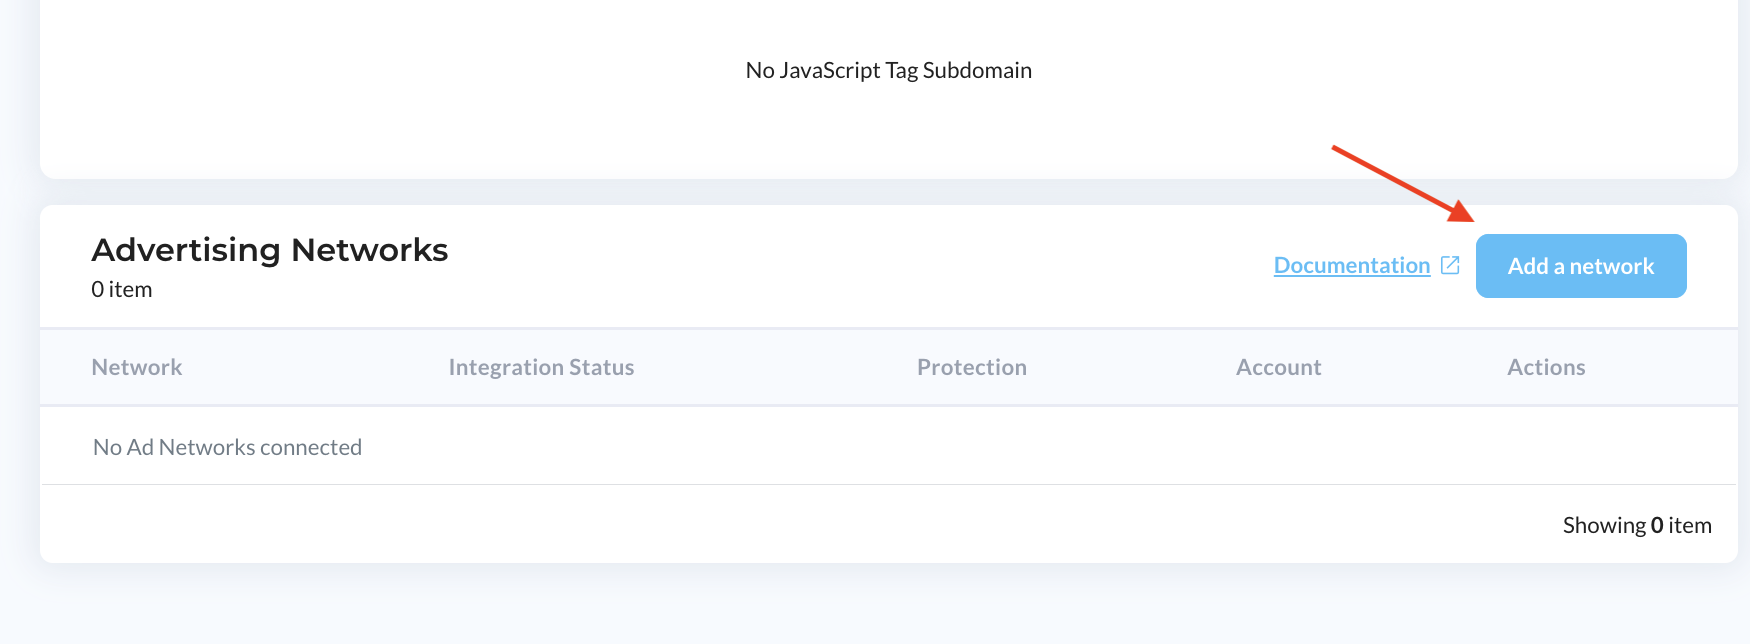
- Scroll down to the "Advertising Networks" section.
- Click on "Add a network" and follow the interface to connect your google Ads account.
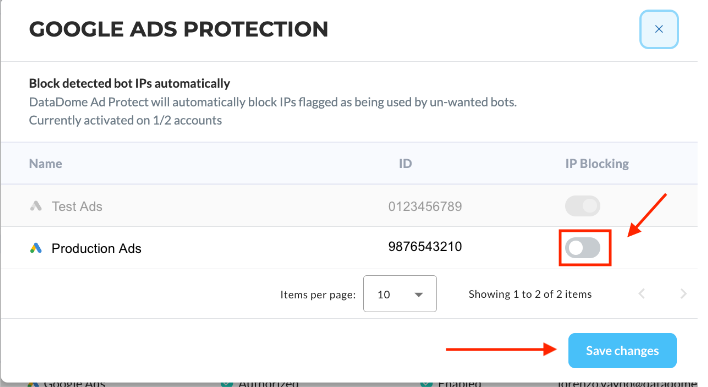
- Click on the three dots close to the "Google Ads" network and select "Manage Protection".

- Among the list of accounts, choose one(s) for which protection should be activated and turn on the toggle "IP Blocking", then save changes.
Updated 8 months ago
Did this page help you?