Auth0 integration
DataDome Account Protect detects account takeover threats and fake registration and protects you against them
Prerequisites for Account ProtectAccount Protect is separate from Bot Protect and is not available on your account by default.
Please contact your account manager to enable it.This service requires a dedicated API key, which will be available on your dashboard once it is enabled.
Main concepts
Setting up Account Protect on Auth0 will enable us to collect more business data (email, social ID, ...) during login and registration events. We will be able to detect account takeovers and fake account creations.
You can find more insights about our detection on the Account Protect Dashboard.
Installation
Step 1: Configure Auth0 to send successful login events to DataDome Account Protect
- Connect to the Auth0 Console
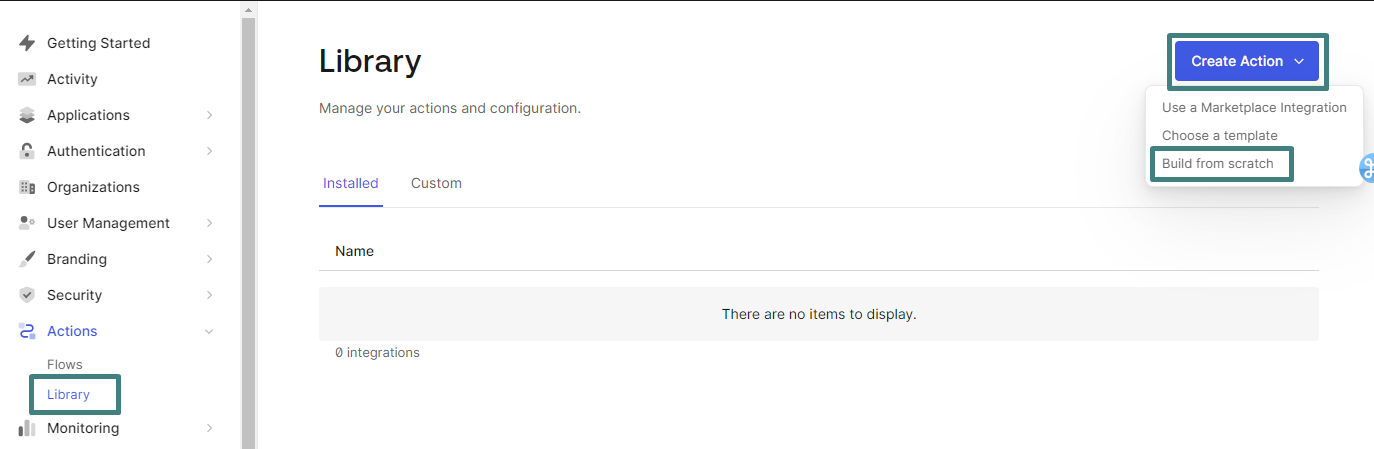
- Go to Actions > Library and click on Create Action > Build from scratch
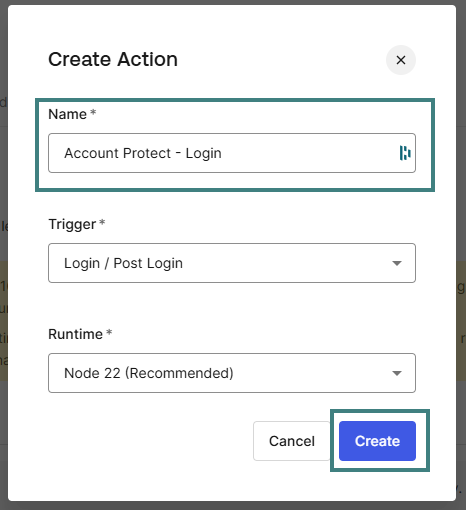
- Enter Account Protect - Login for the name, select Login / Post Login for the trigger and Node 22 for the runtime and click on Create
- Copy and Paste the following code
/**
 * Handler that will be called during the execution of a PostLogin flow.
 *
 * @param {Event} event - Details about the user and the context in which they are logging in.
 * @param {PostLoginAPI} api - Interface whose methods can be used to change the behavior of the login.
 */
const axios = require('axios');

exports.onExecutePostLogin = async (event, api) => {
  // Filter refresh token event to not send these events to Athos
  if (event.request.query?.prompt === 'none' || event.transaction?.protocol === 'oauth2-refresh-token') {
    return;
  }

  const strategy = event.connection?.strategy;
  const isLocalAuth = strategy === 'auth0';
  const authType = isLocalAuth ? 'local' : 'social';
  let socialProvider = undefined;
  if (strategy && !isLocalAuth) {
    switch (strategy) {
      case "facebook":
      case "apple":
      case "twitter":
      case "linkedin":
      case "github":
      case "yahoo":
      case "amazon":
        socialProvider = strategy;
        break;
      case "google-oauth2":
      case "google-apps":
        socialProvider = "google";
        break;
      case "waad":
      case "ad":
      case "adfs":
      case "office365":
      case "windowslive":
      case "yammer":
      case "sharepoint":
        socialProvider = "microsoft";
        break;
      default:
        socialProvider = "other";
        break;
    }
  }

  // Derive the first-factor authentication mode from event.authentication.methods
  const authMethods = event.authentication?.methods ?? [];
  const firstFactor = authMethods.find(m => m.name !== 'mfa');
  let authMode = "other";
  if (firstFactor?.name === 'pwd' || firstFactor?.name == 'passkey') {
    authMode = "password";
  } else if (firstFactor?.name === 'email') {
    authMode = "mail";
  }

  const session = {};
  if (event.session) {
    session.id = event.session.id,
    session.createdAt = event.session.created_at;
  };

  const payload = {
    account: event.user.email ?? event.user.user_id,
    status: "succeeded",
    module: {
      requestTimeMicros: new Date().getTime()*1000,
      name: "Fraud SDK Auth0",
      version: "1.0.0"
    },
    header: {
      addr: event.request.ip,
      method: event.request.method,
      host: event.request.hostname,
      port: 443,
      protocol: "https",
      userAgent: event.request.user_agent,
    },
    user: {
      id: event.user.user_id
    },
    authentication: {
      type: authType,
      ...(socialProvider && { socialProvider }),
      ...(authMode && { mode: authMode }),
    },
    accountCreationDate: event.user.created_at,
    session
  };

  const config = {
    headers: {
      'x-api-key': event.secrets.FRAUD_API_KEY,
      'Content-type': 'application/json'
    },
    timeout: 1500,
  };

  try {
    const res = await axios.post('https://account-api.datadome.co/v1/validate/login', payload, config);
    if (res.status === 200 && res.data?.action === 'deny') { // deny login only if return 200 & action = deny.
      // Custom actions
    }
  } catch (error) {
    console.log(error);
  }
};
- Add a new secrets
FRAUD_API_KEYand fill its value with your Account Protect Key available in your Dashboard.
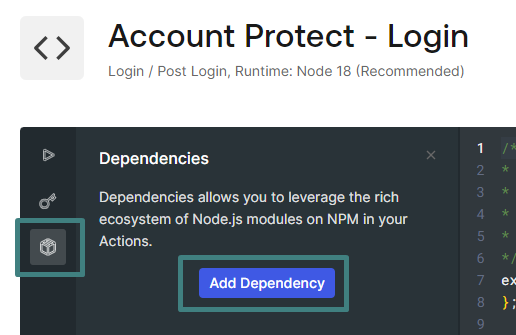
We need to add a dependency to Axios, as we use it as the HTTP client.
-
Click on Add Dependency
-
Enter
axiosin the name field and click on Create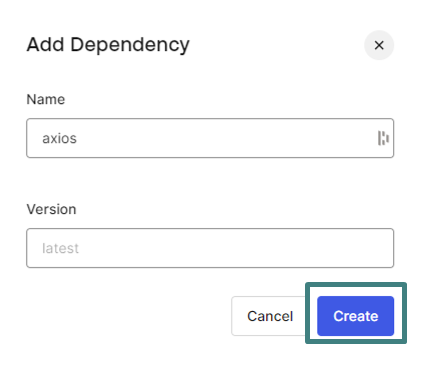
-
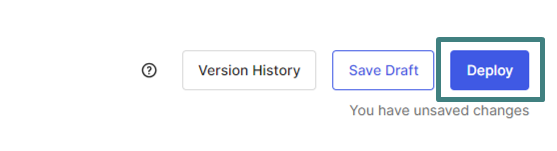
Configuration is now done and you can deploy this new action to your tenant
-
Click on Deploy
Now you have to use the new action (Account Protect - Login) in your authentication pipeline
-
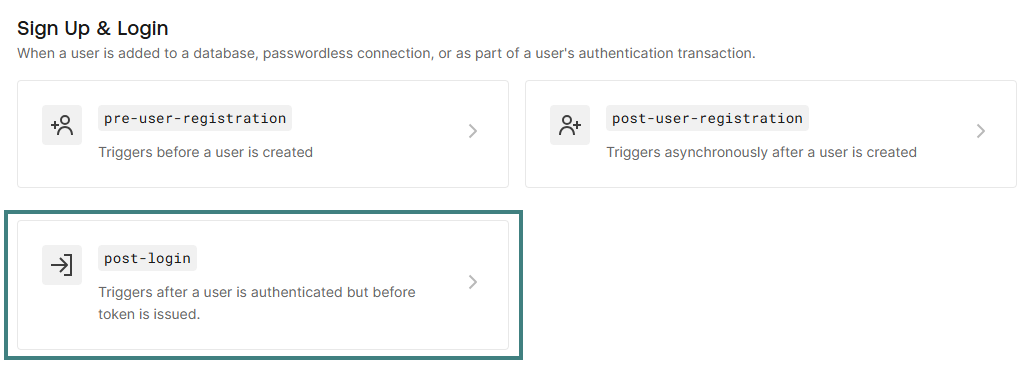
Go to Actions > Triggers
-
Click on post-login
-
Click on Custom on the right panel and move your action in your pipeline
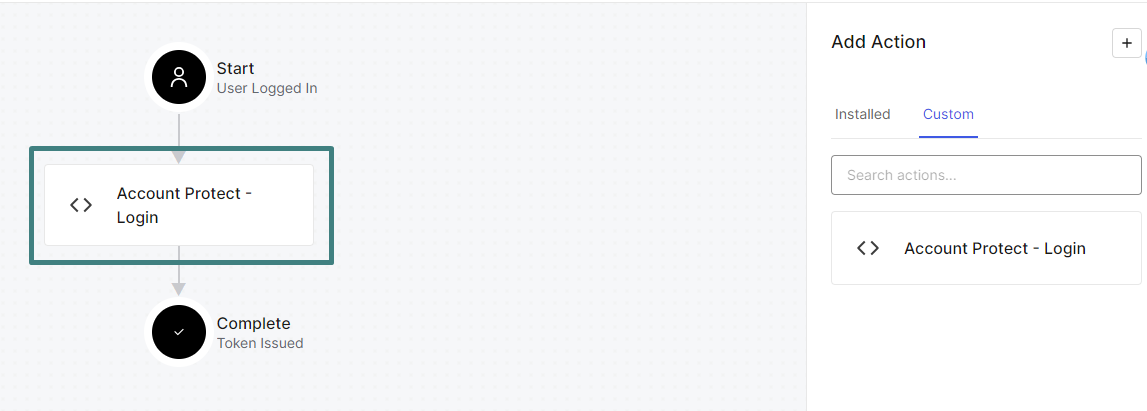
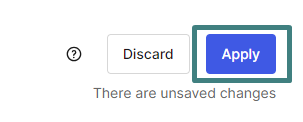
-
Click on Apply
From now on, you will send all successful logins to DataDome Account Protect.
Step 2: Configure Auth0 to send registration events to DataDome Account Protect
-
Connect to the Auth0 Console
-
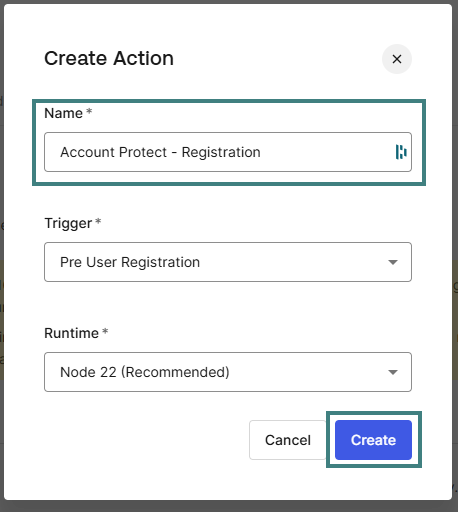
Go to Actions > Library and click on Create Action > Build from scratch
-
Enter Account Protect - Registration for the name, select Pro User Registration for the trigger and Node 22 for the runtime and click on Create
-
Copy and Paste the following code
/**
* Handler that will be called during the execution of a PreUserRegistration flow.
*
* @param {Event} event - Details about the context and user that is attempting to register.
* @param {PreUserRegistrationAPI} api - Interface whose methods can be used to change the behavior of the signup.
*/
const axios = require("axios");

exports.onExecutePreUserRegistration = async (event, api) => {
 const strategy = event.connection?.strategy;
  const isLocalAuth = strategy === 'auth0';
  const authType = isLocalAuth ? 'local' : 'social';
  let socialProvider = undefined;
  if (strategy && !isLocalAuth) {
    switch (strategy) {
      case "facebook":
      case "apple":
      case "twitter":
      case "linkedin":
      case "github":
      case "yahoo":
      case "amazon":
        socialProvider = strategy;
        break;
      case "google-oauth2":
      case "google-apps":
        socialProvider = "google";
        break;
      case "waad":
      case "ad":
      case "adfs":
      case "office365":
      case "windowslive":
      case "yammer":
      case "sharepoint":
        socialProvider = "microsoft";
        break;
      default:
        socialProvider = "other";
        break;
    }
  }

  // Derive the first-factor authentication mode from event.authentication.methods
  const authMethods = event.authentication?.methods ?? [];
  const firstFactor = authMethods.find(m => m.name !== 'mfa');
  let authMode = "other";
  if (firstFactor?.name === 'pwd' || firstFactor?.name == 'passkey') {
    authMode = "password";
  } else if (firstFactor?.name === 'email') {
    authMode = "mail";
  }

  const payload = {
    account: event.user.email,
    status: "succeeded",
    module: {
      requestTimeMicros: new Date().getTime()*1000,
      name: "Fraud SDK Auth0",
      version: "1.0.0"
    },
    header: {
      addr: event.request.ip,
      method: event.request.method,
      host: event.request.hostname,
      port: 443,
      protocol: "https",
      userAgent: event.request.user_agent,
    },
    user: {
      id: event.user.email,
      email: event.user.email,
      lastName: event.user.family_name,
      firstName: event.user.given_name,
      displayName: event.user.name,
      phone: event.user.phone_number,
      pictureUrls: [event.user.picture],
    },
    authentication: {
      type: authType,
      ...(socialProvider && { socialProvider }),
      ...(authMode && { mode: authMode }),
    }
  };

  const config = {
    headers: {
      'x-api-key': event.secrets.FRAUD_API_KEY,
      'Content-type': 'application/json'
    },
    timeout: 1500,
  };

  try {
    const res = await axios.post('https://account-api.datadome.co/v1/validate/registration', payload, config);
    if (res.status === 200 && res.data?.action === 'deny') { // deny login only if return 200 & action = deny.
      // Custom actions
    }
  } catch (error) {
    console.log(error);
  }
};- Add a new secrets
FRAUD_API_KEYand fill its value with your Account Protect Key available in your Dashboard.
We need to add a dependency to Axios, as we use it as the HTTP client.
-
Click on Add Dependency
-
Enter
axiosin the name field and click on Create
-
Configuration is now done and you can deploy this new action to your tenant
-
Click on Deploy
Now you have to use the new action (Account Protect - Registration) in your registration pipeline.
-
Go to Actions > Triggers
-
Click on pre-user-registration

-
Click on Custom on the right panel and move action Account Protect Registration in your pipeline
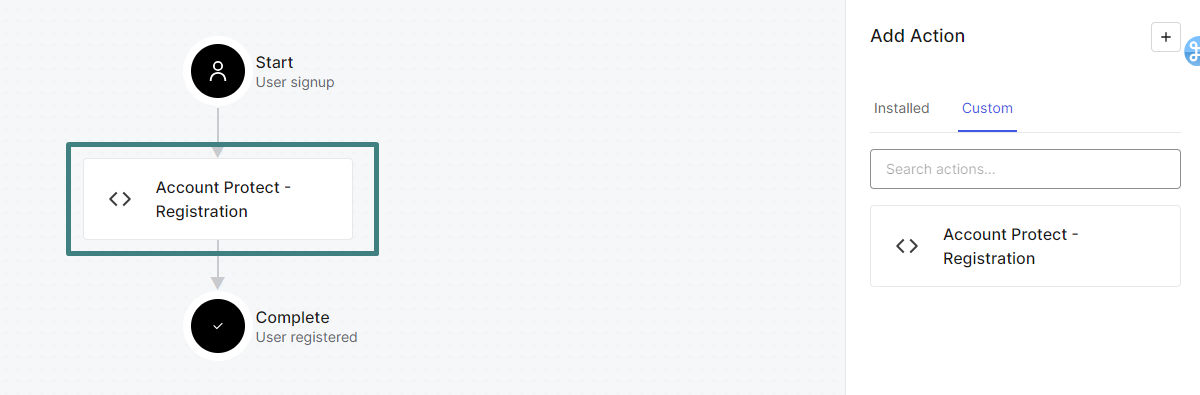
Click on Apply
From now on, you will send all registrations to DataDome Account Protect.
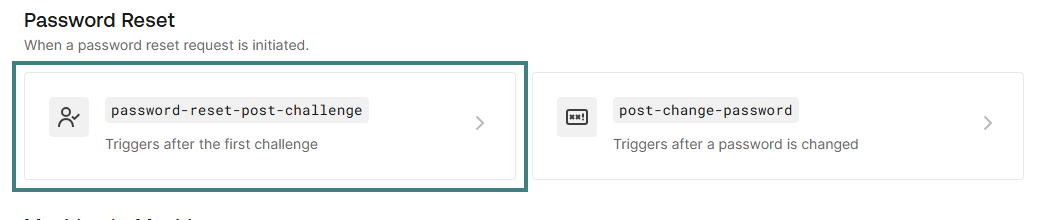
Step 3: Configure Auth0 to send password reset events to DataDome Account Protect
-
Connect to the Auth0 Console
-
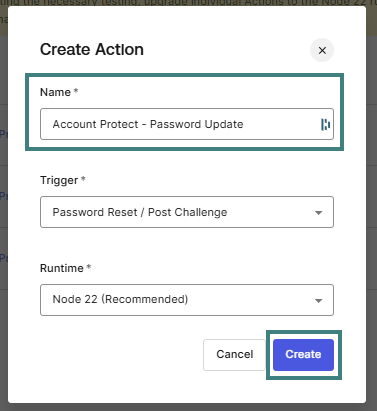
Go to Actions > Library and click on Create Action > Build from scratch
-
Enter Account Protect - Password Update for the name, select Password Reset / Post Challenge for the trigger and Node 22 for the runtime and click on Create
-
Copy and Paste the following code
/**
 * Handler that will be called during the execution of a Password Reset / Post Challenge Flow.
 *
 * @param {Event} event - Details about the post challenge request.
 * @param {PasswordResetPostChallengeAPI} api - Interface whose methods can be used to change the behavior of the post challenge flow.
 */
const axios = require("axios");

exports.onExecutePostChallenge = async (event, api) => {
  const strategy = event.connection?.strategy;
  const isLocalAuth = strategy === 'auth0';
  const authType = isLocalAuth ? 'local' : 'social';
  let socialProvider = undefined;
  if (strategy && !isLocalAuth) {
    switch (strategy) {
      case "facebook":
      case "apple":
      case "twitter":
      case "linkedin":
      case "github":
      case "yahoo":
      case "amazon":
        socialProvider = strategy;
        break;
      case "google-oauth2":
      case "google-apps":
        socialProvider = "google";
        break;
      case "waad":
      case "ad":
      case "adfs":
      case "office365":
      case "windowslive":
      case "yammer":
      case "sharepoint":
        socialProvider = "microsoft";
        break;
      default:
        socialProvider = "other";
        break;
    }
  }

  // Derive the first-factor authentication mode from event.authentication.methods
  const authMethods = event.authentication?.methods ?? [];
  const firstFactor = authMethods.find(m => m.name !== 'mfa');
  let authMode = "other";
  if (firstFactor?.name === 'pwd' || firstFactor?.name == 'passkey') {
    authMode = "password";
  } else if (firstFactor?.name === 'email') {
    authMode = "mail";
  }

  const payload = {
    account: event.user.email,
    reason: "forgotPassword",
    status: "attempted",
    module: {
      requestTimeMicros: new Date().getTime()*1000,
      name: "Fraud SDK Auth0",
      version: "1.0.0"
    },
    header: {
      addr: event.request.ip,
      method: event.request.method,
      host: event.request.hostname,
      port: 443,
      protocol: "https",
      userAgent: event.request.user_agent
    },
    user: {
      id: event.user.email,
    },
    accountCreationDate: event.user.created_at,
    authentication: {
      type: authType,
      ...(socialProvider && { socialProvider }),
      ...(authMode && { mode: authMode }),
    }
  };

  const config = {
    headers: {
      'x-api-key': event.secrets.FRAUD_API_KEY,
      'Content-type': 'application/json'
    },
    timeout: 1500,
  };

  try {
    const res = await axios.post('https://account-api.datadome.co/v1/validate/password/update', payload, config);
    if (res.status === 200 && res.data?.action === 'deny') { // deny login only if return 200 & action = deny.
      // Custom actions
    }
  } catch (error) {
    console.log(error);
  }
};


/**
 * Handler that will be invoked when this action is resuming after an external redirect. If your
 * onExecutePostChallenge function does not perform a redirect, this function can be safely ignored.
 *
 * @param {Event} event - Details about the user and the context in which they are logging in.
 * @param {PasswordResetPostChallengeAPI} api - Interface whose methods can be used to change the behavior of the post challenge flow.
 */
// exports.onContinuePostChallenge = async (event, api) => {
// };
- Add a new secrets
FRAUD_API_KEYand fill its value with your Account Protect Key available in your Dashboard.
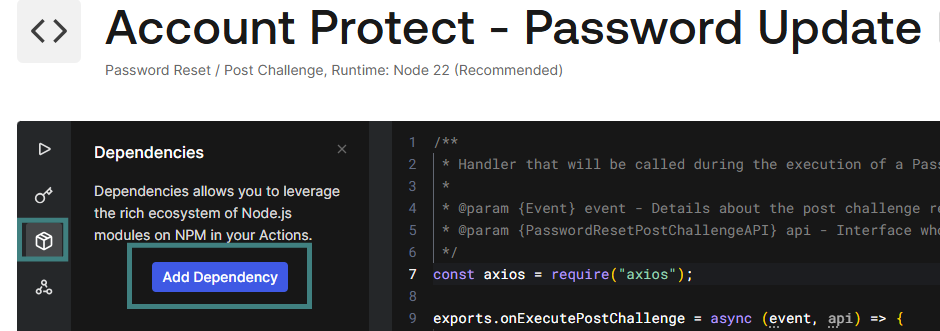
We need to add a dependency to Axios, as we use it as the HTTP client.
-
Click on Add Dependency
-
Enter
axiosin the name field and click on Create
-
Configuration is now done and you can deploy this new action to your tenant
-
Click on Deploy
Now you have to use the new action (Account Protect - Password Update) in your authentication pipeline.
-
Go to Actions > Triggers
-
Click on password-reset-post-challenge
-
Click on Custom on the right panel and move action Account Protect Password Update in your pipeline

-
Click on Apply
From now on, you will send all password update to DataDome Account Protect.
Step 4: Configure Auth0 to send failed events to DataDome Account Protect
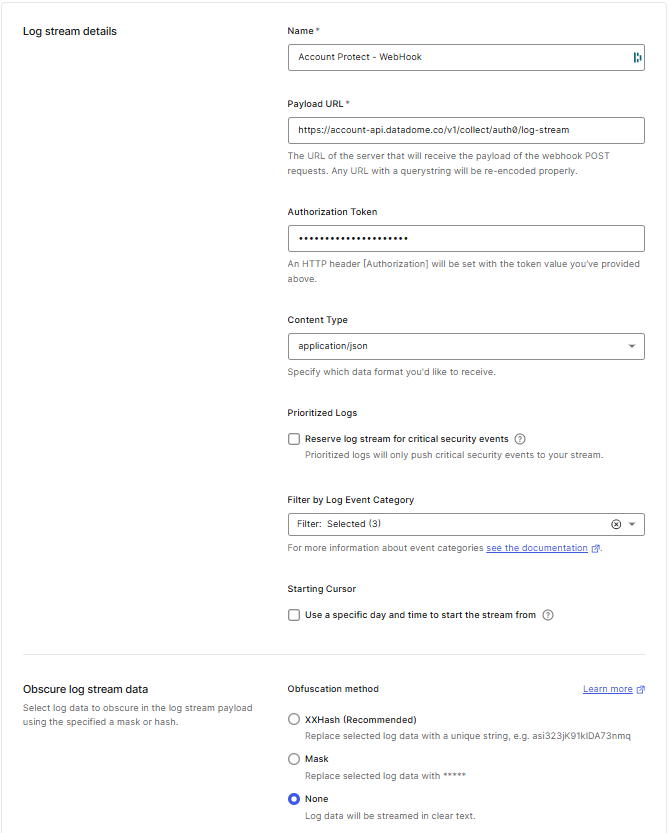
You need to configure an Auth0 log stream to a DataDome webhook.
- Go to Monitoring > Log Streams and click on Create Stream.

- Enter the following information
- Name: Account Protect - WebHook
- Payload URL: https://account-api.datadome.co/v1/collect/auth0/log-stream
- Authorization Token: The Account Protect Key available on your Dashboard
- Content Type: application/json
- Prioritized Logs: unchecked
- Content Format:JSON Object
- Filter by Event Category: Select
- Login - Failure (Failed login logs)
- Signup - Failure (Failed signup logs)
- User/Behavioral - Failure (Failed user/behavioral logs)
- Don't forget to click on "Apply" to ensure it is taken into account.
- Obscure log stream data: None
- Click on Save.
From now on, you will send all failed login, registration, or password update events to DataDome Account Protect.
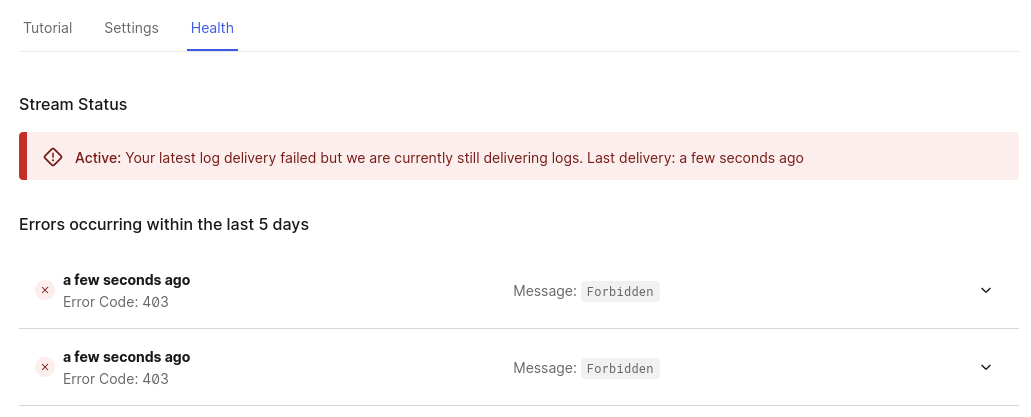
How to check failed events that were not sent to DataDome Account Protect
- Go to Monitoring > Log Steams and click on Account Protect - WebHook.
- Select the Health tab
This will allow you to check the last errors received by the Auth0 webhook.
In the example below, the wrong API key was used:
API Reference
Find below the available properties by events and the Auth0 properties they are linked to.
Login Event
The default values are mapped to the properties provided in the Post-Login event.
Here is the full table converted to Markdown format:
| Name | Description | Default Value | Possible Values | Optional |
|---|---|---|---|---|
| account | The unique account identifier used for the login attempt. | event.user.email | Any string value. | No |
| authentication.mode | Authentication mode | Depends of the value of event.authentication.methods.name: - password if the value is pwd or passkey.- mail if the value is email- other for other values | biometric, mail, mfa, otp, password, other | Yes |
| authentication.socialProvider | Authentication social provider | Depends of the value of event.connection.strategy. Find the list of possible values on this API reference. | amazon, apple, facebook, github, google, linkedin, microsoft, twitter, yahoo, other | Yes |
| authentication.type | Authentication type | local if the event.connection.strategy is auth0, social otherwise | local, socialProvider, other | Yes |
| accountType | Describe the type of the account. | guest, staffexternalpartner, customer, merchant, vip, test, other | Yes | |
| accountCreationDate | Date when account was created. | event.user.created_at | Format ISO 8601 YYYY-MM-DDThh:mm:ssTZD | Yes |
| customFields | See dedicated custom fields section in the FAQ. | |||
| failReason | Reason why the login failed. | unknownAccount, wrongPassword, expiredPassword, disabledAccount, blockedAccount, invalidMfa, internalBusinessRule, technicalIssue, other | ||
| partnerId | Identify the partner using the solution. | Any string value. | Yes | |
| session.createdAt | Creation date of the session. | event.session.created_at | Format ISO 8601 YYYY-MM-DDThh:mm:ssTZD | Yes |
| session.id | A unique session identifier from your system. | event.session.id | Any string value. | Yes |
| status | The status of the login attempt. | StatusType.SUCCEEDED | StatusType.SUCCEEDED, StatusType.FAILED | Yes |
| user.id | A unique customer identifier from your system. It has to be the same for all other events sent. | user.user_id | Any string value. | No |
Registration Event
The default values are mapped to the properties provided in the Pre-user-registration event.
| Name | Description | Default Value | Possible Values | Optional |
|---|---|---|---|---|
| account | The unique account identifier used for the login attempt. | event.user.email | Any string value. | No |
| authentication.mode | Authentication mode | Depends of the value of event.authentication.methods.name: - password if the value is pwd or passkey.- mail if the value is email - other for other values | biometric, mail mfa, otp, password, other | Yes |
| authentication.socialProvider | Authentication social provider | Depends of the value of event.connection.strategy. Find the list of possible values on this API reference. | amazon, apple, facebook, github, google, linkedin, microsoft, twitter, yahoo, other | Yes |
| authentication.type | Authentication type | local if the event.connection.strategy is auth0, social otherwise | local, socialProvider, other | Yes |
| accountType | Describe the type of the account | guest, staff,external,partner, customer, merchant, vip, test, other | Yes | |
| customFields | See dedicated custom fields section in the FAQ | |||
| failReason | Reason why the registration failed | duplicateAccount, invalidMfa, cancelled, internalBusinessRule, technicalIssue, other | ||
| partnerId | Identify the partner using the solution. | Any string value. | ||
| session.createdAt | Creation date of the session | Format ISO 8601 YYYY-MM-DDThh:mm:ssTZD | Yes | |
| session.id | A unique session identifier from your system | Any string value. | Yes | |
| status | Registration status | attempted, succeeded, failed | ||
| user.address.city | City of the address | Any string value. | Yes | |
| user.address.countryCode | Country of the address | Format ISO-3166-1-alpha-2 | Yes | |
| user.address.line1 | Line 1 of the address | Any string value. | Yes | |
| user.address.line2 | Line 2 of the address | Any string value. | Yes | |
| user.address.regionCode | Region code | Yes | ||
| user.address.zipCode | Zip code | Yes | ||
| user.createdAt | Creation date of the user | Format ISO 8601 YYYY-MM-DDThh:mm:ssTZD | Yes | |
| user.description | Description or biography of the user | Any string value. | Yes | |
| user.displayName | Display name of the user | event.user.name | Any string value. | Yes |
| user.email | Email of the user | event.user.email | Valid email address | Yes |
| user.externalUrls | External URLs of the user | An array of valid URL address (max 10 items) | Yes | |
| user.firstName | First name of the user | event.user.given_name | Any string value. | Yes |
| user.id | A unique customer identifier from your system. It has to be the same for all other event sent | event.user.email | Any string value. | No |
| user.lastName | Last name of the user | event.user.family_name | Any string value. | Yes |
| user.phone | Phone of the user | event.user.phone_number | E.164 format including + and a region code Example : example +33978787878 | Yes |
| user.pictureUrls | Pictures of the user | An array with a single element from event.user.picture | An array of valid URL address (max 10 items) | Yes |
| user.title | Title of the user | mr, mrs, mx | Yes | |
| user.dateOfBirth | Date of birth of the user | Format ISO 8601 YYYY-MM-DDThh:mm:ssTZD |
Password Update Event
The default values are mapped to the properties provided in the Post-challenge event.
| Name | Description | Default value | Possible values | Optional |
|---|---|---|---|---|
| account | The unique account identifier used for the login attempt. | event.user.email | Any string value. | No |
| accountCreationDate | Date when account was created. | event.user.created_at | Format ISO 8601 YYYY-MM-DDThh:mm:ssTZD | Yes |
| customFields | See the dedicated custom fields section in the Frequently Asked Questions. | Yes | ||
| authentication.mode | Authentication mode | Depends on the value of event.authentication.methods.name:- password if the value is pwd or passkey.- mail if the value is email - other for other values | biometric, mail mfa, otp, password, other | Yes |
| authentication.socialProvider | Authentication social provider | Depends on the value of event.connection.strategy.Find the list of possible values on this API reference. | amazon, apple, facebook, github, google, linkedin, microsoft, twitter, yahoo, other | Yes |
| authentication.type | Authentication type | local if the event.connection.strategy is auth0, social otherwise | local, socialProvider, other | Yes |
| partnerId | Identify the partner using the solution. | Any string value. | Yes | |
| reason | Reason for the password change. | forgotPassword | forcedReset, forgotPassword, userUpdate | No |
| session.createdAt | Creation date of the session. | Format ISO 8601 YYYY-MM-DDThh:mm:ssTZD | Yes | |
| session.id | A unique session identifier from your system. | Any string value. | Yes | |
| status | Status of the password change. | attempted | attempted, failed, succeeded, linkExpired | |
| user.id | A unique customer identifier from your system. It has to be the same for all other events sent | event.user.user_id | Any string value. | No |
Updated 14 days ago