Waiting room
Creating a waiting room
To create a new waiting room, click the Create waiting room button and follow the two-step configuration process.
- Go to
Priority Protect>Priorities
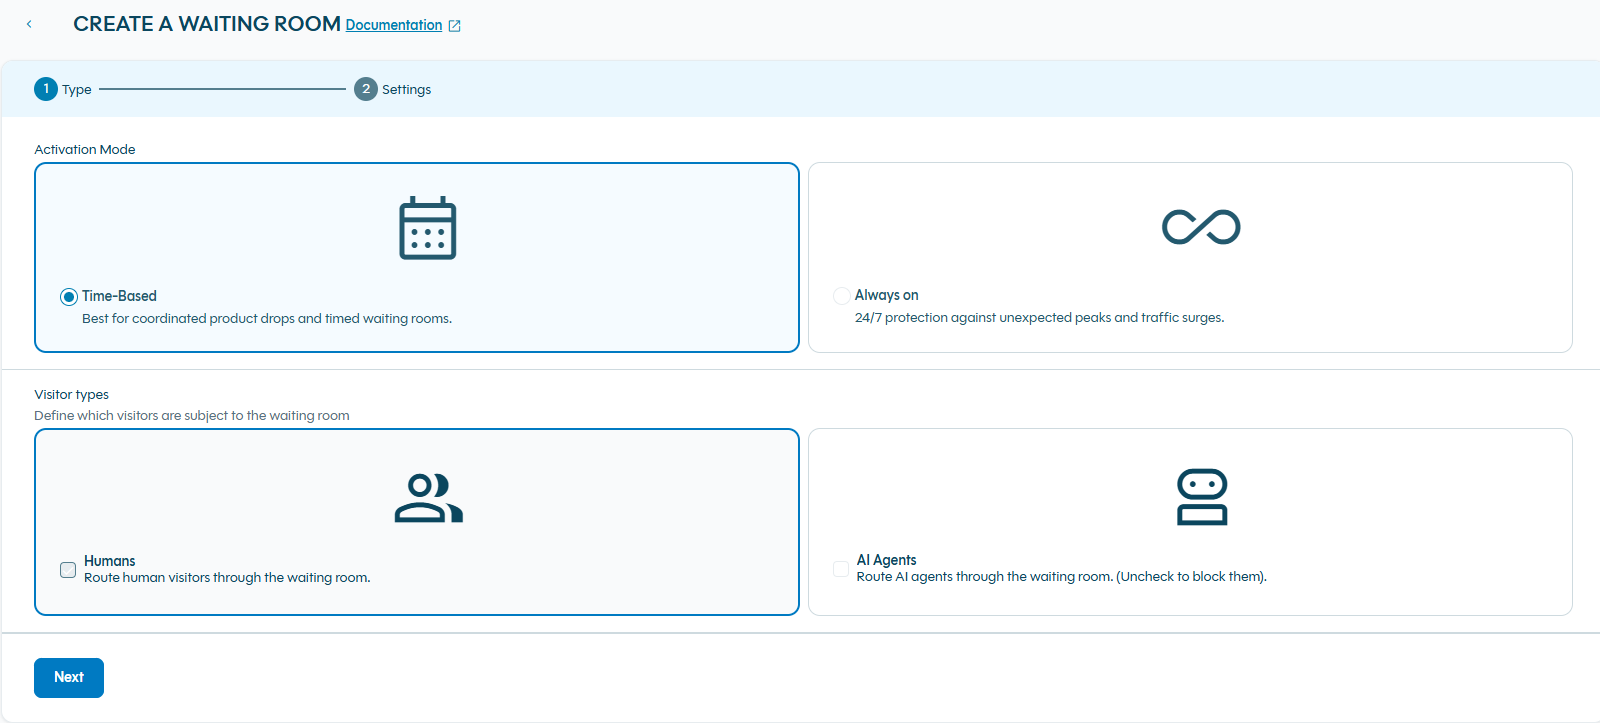
Step 1: Type
1. Activation Mode
Choose how to activate your waiting room:
| Mode | Description | Best For |
|---|---|---|
| Time-Based | Waiting room is active only during specified date and time windows | Product launches, flash sales, event ticket releases with known start times |
| Always On | Waiting room is continuously active 24/7 | High-traffic pages that consistently need traffic management |
2. Visitor Types
Select which types of visitors should be allowed to join your waiting room:
- Humans: Allow human visitors to join your waiting room(Can't be removed)
- AI Agents : Allow AI agents to access your waiting room
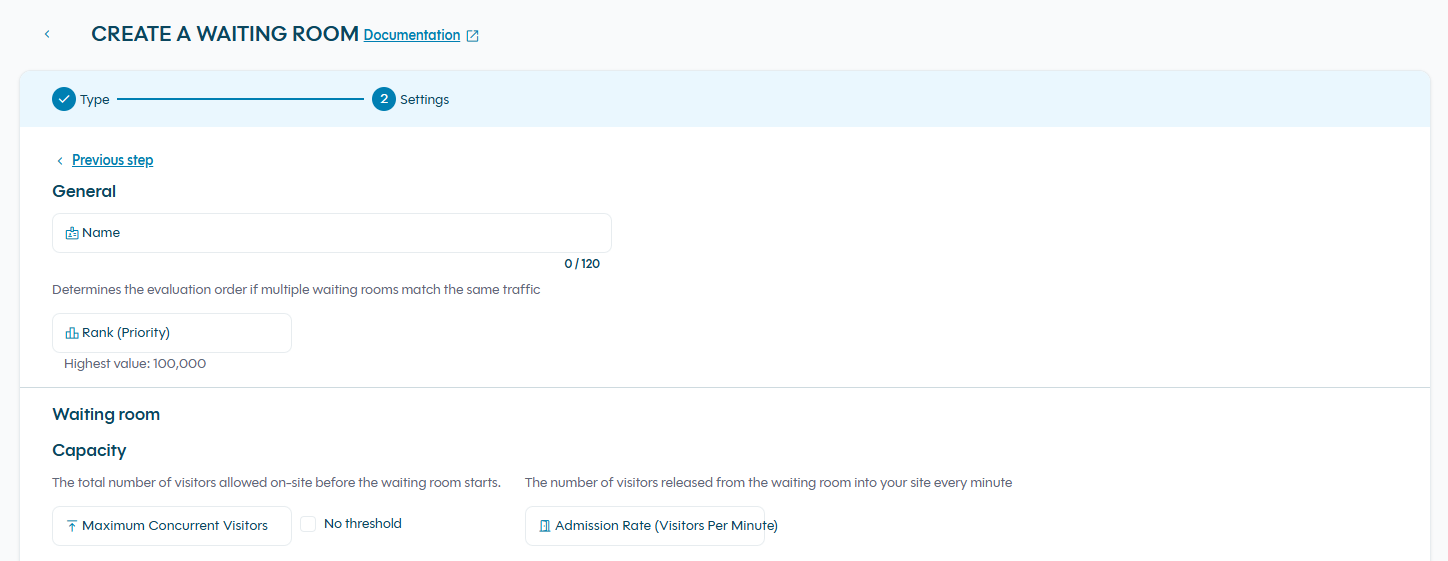
Step 2: Settings
Configure the core parameters of your waiting room :
| Field | Description |
|---|---|
| Name | A unique label to identify your waiting room |
| Maximum concurrent visitors | Maximum number of visitors allowed on your website before new visitors are placed in the waiting room. |
| Admission rate | Maximum number of visitors granted access to your website per minute. Controls the flow rate from waiting room to your site. |
| Rank | waiting room order compared to other priorities (must be unique). Lower numbers = higher priority |
Matching Condition
Define which visitors will be directed to the waiting room using DataDome's Lucene query syntax :

domain:www.example.org AND url:/product/548701156Matching Syntax You can use domain, URL, query parameters, or combine multiple conditions. See the traffic queries syntax user guide for detailed syntax guidelines.
Direct Access
The Direct Access section lets you choose which types of traffic are allowed to completely bypass the waiting room and reach your site immediately.

These settings only apply to traffic that has already been allowed by your DataDome Bot Protect configuration. Traffic that skip the waiting room will not appear in Priority Protect metrics or analytics (it does not count toward capacity, admission rate, or waiting room reports).
| Option | Description |
|---|---|
| Verified bots | Automatically lets trusted search engine crawlers (e.g. Googlebot, Bingbot, BaiduSpider, etc.) skip the waiting room. This is strongly recommended to protect your SEO and ensure legitimate search engines can crawl your pages without being delayed. |
| Custom rules | Automatically lets any traffic that matches your existing Bot Protect “Allow” rules skip the waiting room. Useful for trusted partners, internal tools, monitoring services, or any custom allow-list you have already defined in Bot Protect. |
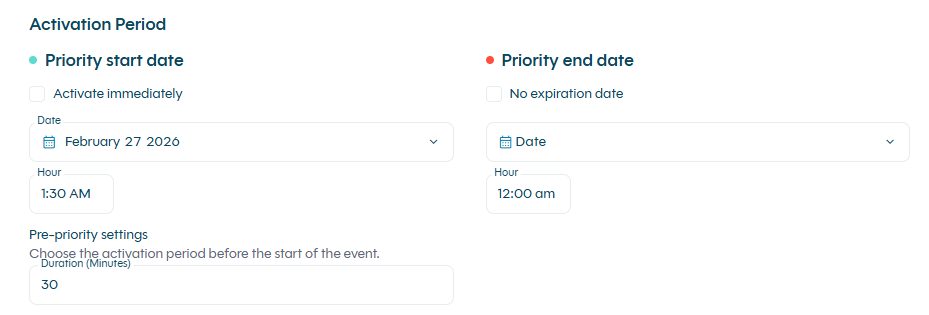
Activation Period (Scheduled waiting room only)
For Time-Based priorities, configure when your priority should be active:
- Priority start date : When the priority becomes active
- Priority end date : When the priority deactivates
Pre-Admission Settings
Configure when visitors can begin joining the waiting room before the priority officially starts:
- Duration (minutes) : How many minutes before the waiting room start time visitors can join the pre-admission (Default : 30 minutes)
This feature is useful for managing early arrivals and building an orderly waiting room before high-demand events.
Activating and Deactivating waiting room
You can enable or disable any waiting room at any time without deleting it. This is useful for:
- Testing waiting room configurations before going live
- Temporarily pausing a waiting room during maintenance
- Quickly reactivating a waiting room for unexpected traffic surges
- Keeping waiting room configurations for recurring events
To activate a deactivated waiting room
-
Navigate to
Priority Protect>Priorities -
Find the priority you want to activate (shown with "Deactivated" status)
-
Click the Actions menu (
⋮) -
Select
Activate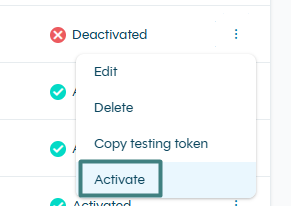
The waiting room status will change to `Activated`` immediately and the priority will begin processing traffic according to its configuration.
How to Deactivate a waiting room
-
Navigate to
Priority Protect>Priorities -
Find the waiting room you want to deactivate (shown with "Activated" status)
-
Click the Actions menu (
⋮) -
Select
Deactivate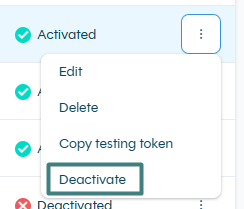
The waiting room status will change to "Deactivated" immediately and the waiting room will stop processing traffic.
Impact of Deactivation
When you deactivate a waiting room:
- All visitors currently in the waiting room will be immediately admitted to your site.
- The waiting room configuration is preserved and can be reactivated at any time.
Use caution when deactivating a waiting room during high-traffic events, as this will cause a sudden traffic surge.
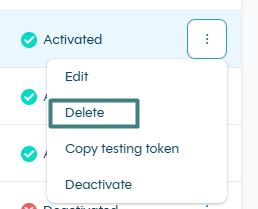
Deleting a waiting room
-
Navigate to
Priority Protect>Priorities -
Find the waiting room you want to remove
-
Click
...>Delete -
Confirm the deletion. All visitors in waiting room will be redirected instantly to your site.
FAQ
Can I have multiple waiting room active at the same time?
Yes! You can have multiple waiting room active simultaneously. The rank determines which waiting room is applied when a visitor matches multiple conditions.
How many languages does Priority Protect support?
Priority Protect supports 100+ languages out of the box, the same as the DataDome Platform by default. On default template, the language is automatically detected based on the visitor's browser Accept-Language header. No configuration required.
What happens if I change capacity settings during an active event?
Changes take effect immediately. If you increase capacity, more visitors will be admitted from the waiting room. If you decrease capacity, admission rate will slow but visitors already on your site will not be removed.
What's the difference between admission rate and maximum concurrent visitors?
Maximum concurrent visitors is the total capacity on your site at any moment. Admission rate controls how fast new visitors are let in from the priority (per minute). Think of capacity as "room size" and admission rate as "door size."
How long does a visitor's session last once admitted to the website?
Once a visitor is admitted through the waiting room, their session is valid for 15 minutes. If the visitor leaves the website and returns within this window, they will not be placed back in the waiting room. After 15 minutes, they may be required to go through the waiting room again if it is still active.
Updated 11 days ago